
Nowadays we have in the current market several ways of deploying and managing Kubernetes clusters. On premises/virtualised deployments with KubeAdm and as a service within cloud providers like AWS, GCP and Azure.
In this post I will share the experience of using “eksctl” which stands for Amazon Elastic Kubernetes Service(EKS) command line interface tool. Eksctl provides easy and simple setup for the ones experiencing for the first time or for testing purposes but also it has a deep set of configuration for production environment.
What is required to get started with Eksctl?
- AWS account — https://aws.amazon.com/
- IAM user with programatic access
- Eksctl — https://eksctl.io/
- Kubectl — https://kubernetes.io/docs/tasks/tools/install-kubectl/
- AWS cli at least
1.16.156
For the purpose of this post it will be assumed a previous creation of AWS account. More info of about creation of AWS account my be found here. https://aws.amazon.com/pt/premiumsupport/knowledge-center/create-and-activate-aws-account/
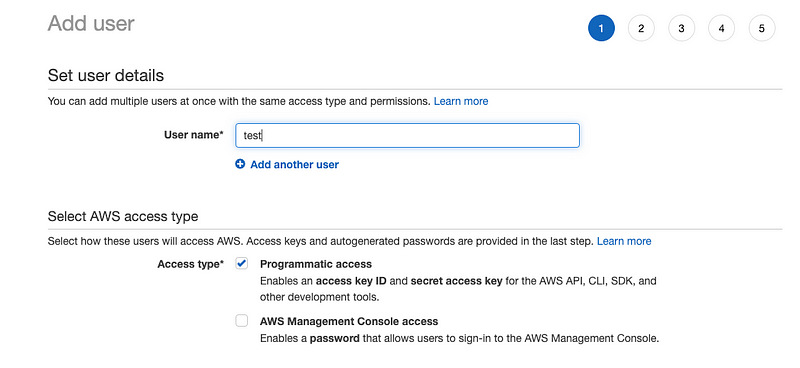
Creating a new user with programatic access:
- Go to AWS console management and under services select Iam → New user and check programatic access.
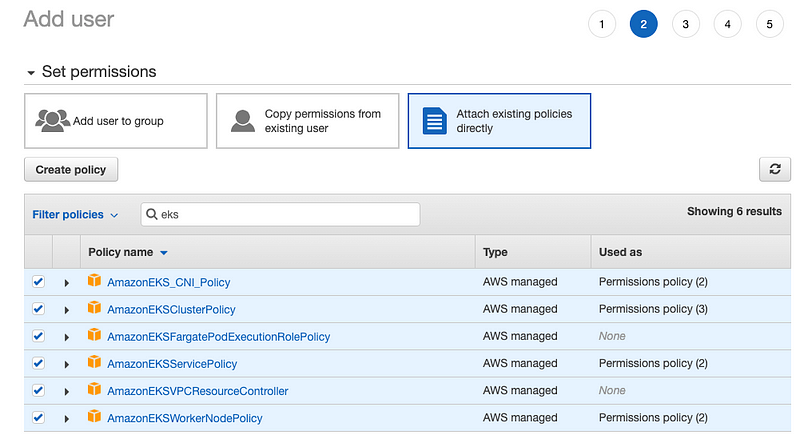
- Select the proper roles for the user:
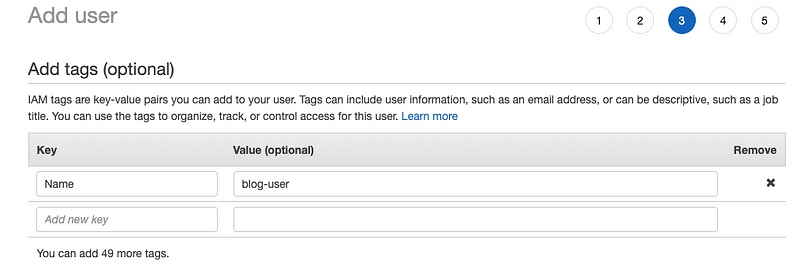
- Tag the user for easy management later:
- Save your Access key ID and Secret access key. Either download the Csv file or click show access key.

Setting up tools: aws-cli, kubectl and eksctl
- Find the correct package for you distribution or operating system https://docs.aws.amazon.com/cli/latest/userguide/install-cliv2.html
- Configure you AWS cli:
- Find the package that suites you best: https://kubernetes.io/docs/tasks/tools/install-kubectl/
- Finally setup eksctl — https://eksctl.io/introduction/#installation


Creating your EKS cluster:
- With a simple execution of:
eksctl create clusterIt will spawn a new K8’s cluster with a random cluster name as no name were provided and configure your .kubeconfig in order to provide access to the cluster.
Try it out:
kubectl config get-contextsIt will show all the kubernetes cluster you have access and the current cluster kubeclt api is pointing.
BE AWARE! With the default configuration it will make use of two m5.large machines in AWS it will occur in billing charges. Remember to delete your cluster.
eksctl delete cluster --name=<name>Creating a cluster with a yaml config file:
Eksctl provides cluster configuration by using an yaml file.
eksctl create cluster -f cluster-setup.yamlFor example:
apiVersion: eksctl.io/v1alpha5
kind: ClusterConfig
metadata:
  name: my-test-cluster
  region: eu-west-1
vpc:
  cidr: 10.10.0.0/16
  autoAllocateIPv6: true
nodeGroups:
  - name: my-node-group
    instanceType: t2.medium
    desiredCapacity: 1
In this example the cluster is configured with the name “my-test-cluster” with a specific CIDR “10.10.0.0/16” and with specifications for node group with the type of instanceType as t2.medium.
Always remember to delete your testing cluster:
eksctl delete cluster -f cluster-setup.yamlManaging node groups and autoscaling:
In order to list your currently node groups you can just use
eksctl get nodegroup --cluster=my-test-clusterAlso its possible to delete and or create new node groups through command line or with yaml file
Here is an example of a new node group with permissions for auto scaling:
apiVersion: eksctl.io/v1alpha5
kind: ClusterConfig
metadata:
  name: my-test-cluster
  region: eu-west-1
vpc:
  cidr: 10.10.0.0/16
  autoAllocateIPv6: true
nodeGroups:
  - name: my-node-group
    instanceType: t2.medium
    minSize: 1
    maxSize: 10
    labels:
     nodegroup-type: label-auto-workloads
    availabilityZones: ["eu-west-1a","eu-west-1b"]
    volumeSize: 40
    volumeType: gp2
    iam:
      withAddonPolicies:
         autoScaler: true
If you apply it with the command:
eksctl create nodegroup --config-file=./cluster-setup.yamlThis will add to your cluster a the node group described in cluster-setup.yaml
It is possible to have several node groups described into a single yaml file and you can make use of included and excluded parameters to chose which node group you want to create/update.
For reference to enable autoscaling it’s required to setup the autoscaler:
Ref link — https://docs.aws.amazon.com/eks/latest/userguide/cluster-autoscaler.html
If you created your cluster using Eksctl it will be easy to install the autoscaler.
Conclusion
With Eksctl you are able o create through command line production ready kubernetes cluster, manage your workloads and node groups with much less complexity and safety.
Give it a try in your next Kubernetes setup 🙂
Related Articles

Building Secure Web Applications in the Age of Cyber Threats: Essential Strategies
Build secure web applications that withstand evolving threats. Learn secure coding practic...
Read more
Infrastructure, Blockchain, and Scalability with Erick Rettozi
In this article, Cyrex' Lead Backend Engineer Erick Retozzi offers expert advice on buildi...
Read more
The Hidden Costs of DIY API Integration: When to Consider Professional Help
Avoid costly mistakes with professional API integration. Learn the hidden costs of DIY API...
Read more
LLMs, the gist
Unlock the magic of Large Language Models (LLMs) with our comprehensive guide. Discover ho...
Read more